Kubernetes > Launch a Cluster using Kubeadm
We shall be using VMs on Google Cloud to build a Kubernetes cluster
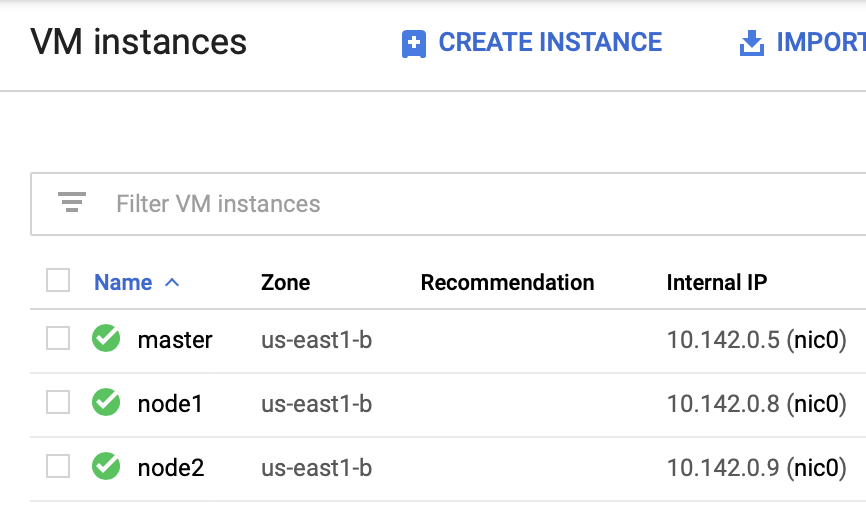
Go to Compute Engine > VM Instances, and click on Create
A cluster should have at least 1 Master and 1 Worker, however a minimum of 3 Workers are recommended for production. Our cluster topology(test environment): 1 Master node and 2 Worker nodes.
Compatible OS on all nodes:
machines running a deb/rpm-compatible OS, for example Ubuntu or CentOS
Our choice: CentOS 7
Hardware requirements
2GB RAM on all Nodes (Masters and Workers)
2 CPUs on Master Nodes
Our choice: 2CPUs and 4GB RAM on all nodes
All nodes must have unique hostname
We shall be using master, node1, and node2
Create 3 VMs with similar configuration, except for the hostnames
Full network connectivity between all nodes either public or private
Our choice: we shall have one NIC on all nodes connected to the same subnet, this connectivity is provided by Google Cloud’s internal network.
We shall be using the google cloud shell by clicking on the icon at the top right corner to interact with the VMs
We can open the cloud shell on a separate window too, by clicking on the icon at the bottom right corner of the window
The default project and zone are to be set
networkandcode@cloudshell:~ (kubernetes-cka-224606)$ gcloud config set compute/zone us-east1-b
Updated property [compute/zone].
networkandcode@cloudshell:~ (kubernetes-cka-224606)$ gcloud config set project kubernetes-cka-224606
Updated property [core/project].
We can now SSH into the master, likewise to other nodes, for the first time, it would prompt for creating an SSH key, passphrase can be left blank
networkandcode@cloudshell:~ (kubernetes-cka-224606)$ gcloud compute ssh master
You may also go with the SSH option provided on the row of the instance name, to open 3 different SSH windows, or can also SSH from your local machine using the SSH key method.
To check the OS details
[networkandcode@master ~]$ sudo cat /etc/centos-release

CentOS Linux release 7.6.1810 (Core)
To check RAM details
[networkandcode@master ~]$ sudo cat /proc/meminfo | grep Mem

MemTotal: 3880524 kB

MemFree: 993092 kB

MemAvailable: 2753192 kB
To check CPU details
[networkandcode@master ~]$ sudo cat /proc/cpuinfo | grep cpu

cpu family : 6

cpu MHz : 2300.000

cpu cores : 1

cpuid level : 13

cpu family : 6

cpu MHz : 2300.000

cpu cores : 1

cpuid level : 13
All nodes must have a unique MAC address(sometimes two different VMs could have the same MAC)
[networkandcode@master ~]$ ip link | grep ether
link/ether 42:01:0a:8e:00:05 brd ff:ff:ff:ff:ff:ff

[networkandcode@node1 ~]$ ip link | grep ether
link/ether 42:01:0a:8e:00:08 brd ff:ff:ff:ff:ff:ff

[networkandcode@node2 ~]$ ip link | grep ether
link/ether 42:01:0a:8e:00:09 brd ff:ff:ff:ff:ff:ff
All nodes must have unique product_uuid
networkandcode@master ~]$ sudo cat /sys/class/dmi/id/product_uuid

1F6A7D57-2B16-521B-1008-5ECDD0F00895

[networkandcode@node1 ~]$ sudo cat /sys/class/dmi/id/product_uuid

A2980F52-12C6-DC19-6194-5949E8E59902

[networkandcode@node2 ~]$ sudo cat /sys/class/dmi/id/product_uuid

1C76D3C4-F102-82C8-7509-2B554EF0C3A0
The following TCP ports should be open on the nodes:
Master(s): 6443, 2379-80, 10250-2
Workers: 10250, 30000-32767
All the ports are open in this testing environment, note: in CentOS firewalld can be used to allow ports. If external firewalls are used these ports should be explicitly allowed.
#this is to be done on all the nodes
networkandcode@node2 ~]$ sudo systemctl stop firewalld
If the Master needs external communication from the internet, add rules accordingly
On the Google Cloud Platform Navigation
Select Networking > VPC Network > Firewall rules
Create a Firewall rule
Name: any-name you want
Targets: specified target tags > master
IP ranges: I have kept 0.0.0.0/0
Specified protocol and ports > tcp:6443; tcp:2379-23880; tcp:10250-10252
Now goto Compute Engine > VM Instances > Click on the Master instance name
Edit > Network Tags > add 'master' here (coz thats tag we added previously)
Hit Save
Similarly rules can be created for nodes for allowing tcp: 10250, 30000-32767
Install container runtime such as Docker, CRI-O, Containerd, frakti
We shall use docker on all nodes
sudo yum install yum-utils device-mapper-persistent-data lvm2 -y
sudo yum-config-manager --add-repo https://download.docker.com/linux/centos/docker-ce.repo
sudo yum update && sudo yum install docker-ce-18.06.2.ce -y
sudo mkdir /etc/docker
# Setup daemon.
cat > /etc/docker/daemon.json <<EOF
{
"exec-opts": ["native.cgroupdriver=systemd"],
"log-driver": "json-file",
"log-opts": {
"max-size": "100m"
},
"storage-driver": "overlay2",
"storage-opts": [
"overlay2.override_kernel_check=true"
]
}
EOF

mkdir -p /etc/systemd/system/docker.service.d
Install Kubeadm:
cat < /etc/yum.repos.d/kubernetes.repo
[kubernetes]
name=Kubernetes
baseurl=https://packages.cloud.google.com/yum/repos/kubernetes-el7-x86_64
enabled=1
gpgcheck=1
repo_gpgcheck=1
gpgkey=https://packages.cloud.google.com/yum/doc/yum-key.gpg https://packages.cloud.google.com/yum/doc/rpm-package-key.gpg
exclude=kube*
EOF

# Set SELinux in permissive mode (effectively disabling it)
setenforce 0
sed -i 's/^SELINUX=enforcing$/SELINUX=permissive/' /etc/selinux/config

yum install -y kubelet kubeadm kubectl --disableexcludes=kubernetes

systemctl enable --now kubelet

cat <  /etc/sysctl.d/k8s.conf
net.bridge.bridge-nf-call-ip6tables = 1
net.bridge.bridge-nf-call-iptables = 1
EOF
sysctl --system
On the master:
systemctl start docker.service
sudo kubeadm init --pod-network-cidr=192.168.0.0/16 # for calico pod network addon
#Please capture the output on the master terminal, you would need it for adding nodes
mkdir -p $HOME/.kube
sudo cp -i /etc/kubernetes/admin.conf $HOME/.kube/config
sudo chown $(id -u):$(id -g) $HOME/.kube/config
#to enable Calico plugin
kubectl apply -f https://docs.projectcalico.org/v3.3/getting-started/kubernetes/installation/hosted/rbac-kdd.yaml
kubectl apply -f https://docs.projectcalico.org/v3.3/getting-started/kubernetes/installation/hosted/kubernetes-datastore/calico-networking/1.7/calico.yaml
On the worker nodes(based on the output captured earlier):
systemctl start docker.service
sudo kubeadm join 10.142.0.5:6443 --token 4napq6.0r0o5w84ixo1xmvh \
--discovery-token-ca-cert-hash sha256:3b9c1b163af8108842294958801c1d5b3e418121900d20904e823a3c1dc55502
on the master:
[networkandcode@master ~]$ kubectl get nodes
NAME STATUS ROLES AGE VERSION
master Ready master 29m v1.14.0
node1 Ready 22s v1.14.0
node2 Ready 25m v1.14.0
The Cluster is now up and running
Reference:
https://kubernetes.io/docs/setup/independent/create-cluster-kubeadm/
https://kubernetes.io/docs/setup/cri/
--end-of-post--